Step 1 – The Sound Material
Once you’ve mastered drum layering, you might find that you’ve lost your desire to download drum sounds, because you’ll be able to imagine and create your own by layering sounds you already have. Nonetheless, before we begin layering, it’s important to get some good sounds to start with.Step 2 – Begin Simply
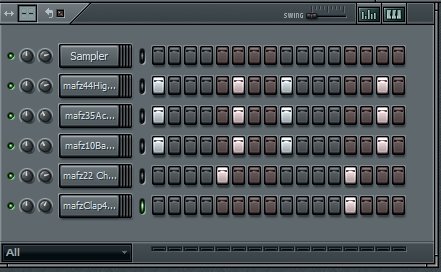
First I’ll start by layering kicks, but first I’ll look for a good starting point. A good punchy sound in the Mafz pack is Kick 44. When combining drum sounds I like to have a some sort of pattern playing while I design, because it’s easier to adjust knobs when you have the sound playing and you can hear what you’re doing. For now, I painted a pattern in the step sequencer and here’s what it looks and sounds like. Note that I adjusted the tempo to 100 bpm.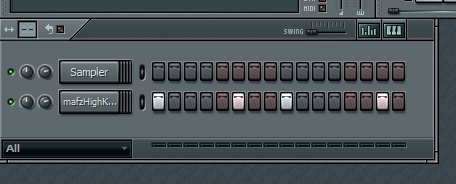
Step 3 – Adding Dirt
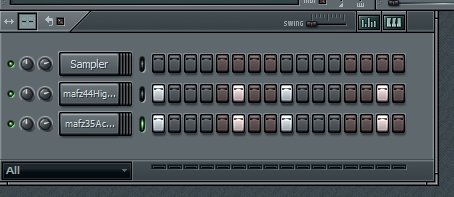
That’s a good start, but I want to make the kick sound a little more dirty, so I’m going to look for a dirty sound to layer with it. I’m actually going to look for an acoustic snare sample because I want to make it sound like the kick is hitting so hard it is causing a snare sitting next to it to rattle a little bit. This sometimes happens with acoustic drumsets, so it will actually sound a little more natural than you might think.The snare I chose from the Mafz pack is Snare 35. I dragged it into the project and painted the same steps as the kick pattern, and I can already tell this going to take a bit of work to make it sound right:
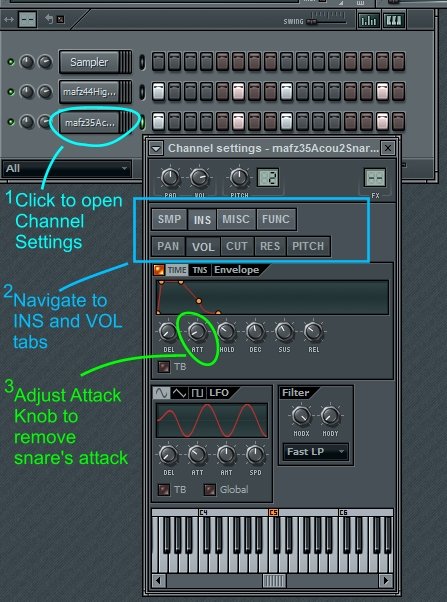
The first thing we need to do is get rid of that snare’s attack. To do this, I’ll open the Channel Settings window for the snare sound, click on the “INS” tab, and adjust the “ATT” knob to put a quick fade in on the sound.
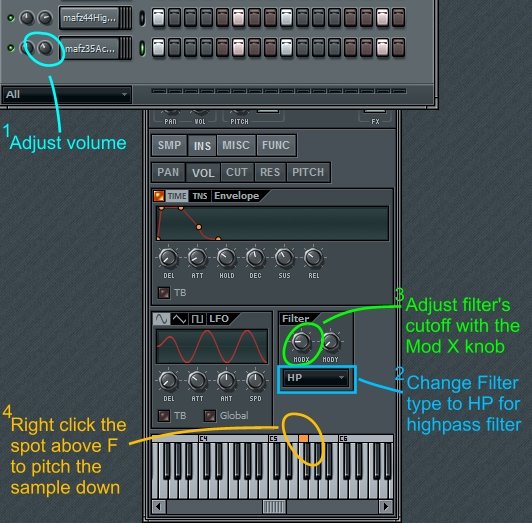
Now that the snare’s attack is gone, two things have become clear. One, the snare’s volume needs to be turned down, and two, the snare’s resonant body is interfering with the kick.
We can filter out the snare’s tonal sound by using the sampler channel’s built-in filter. I’ll change the filter type from “Fast LP” to “HP”, which will make it into a high-pass filter. I’ll also adjust the “Mod X” knob to adjust the filter’s cutoff to 9 o’clock. Then I’ll pitch the sound down six notes by right-clicking the spot above F on the onscreen keyboard. This will make it more grimy, and less sparkly.
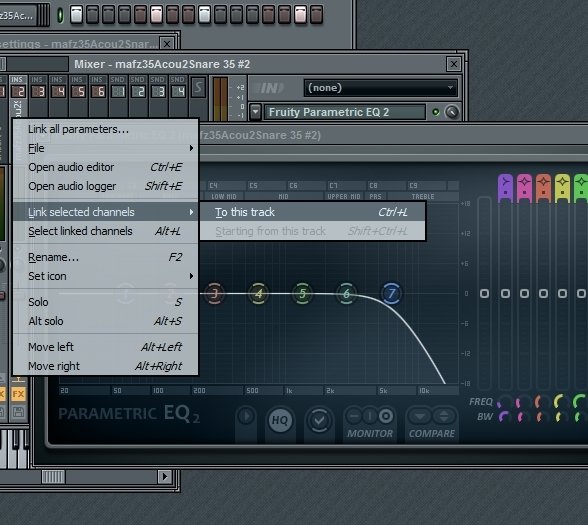
The sound is getting there, but I’m concerned that the snare rattle layer sounds too much like a high hat, so I’ll link the snare sound to a mixer track, and bring up a Parametric EQ 2 to filter out some of the highs.
Step 4 – Make it Punchier
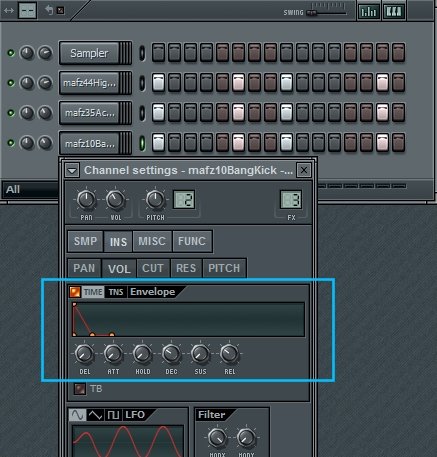
We’ve got an interesting sound going right now, but the attack sounds a little wishy-washy to me. There is not enough “oomph.” I’m going to look for a sound that has a deeper, but clearer attack.To help add some of that I’ll bring in Kick 10 from the Mafz pack and use the amp envelope to remove everything except the attack and some decay of the sound—sort of the opposite of what we did with the snare. To do this, I brought in the sound, painted the pattern in, and turned the ATTack and SUStain knobs all the way down, and adjusted the DECay knob to about 10 o’clock. I also turned the volume down to about 40 percent. Even though the volume is turned way down on it, it makes a big difference when everything is added together.
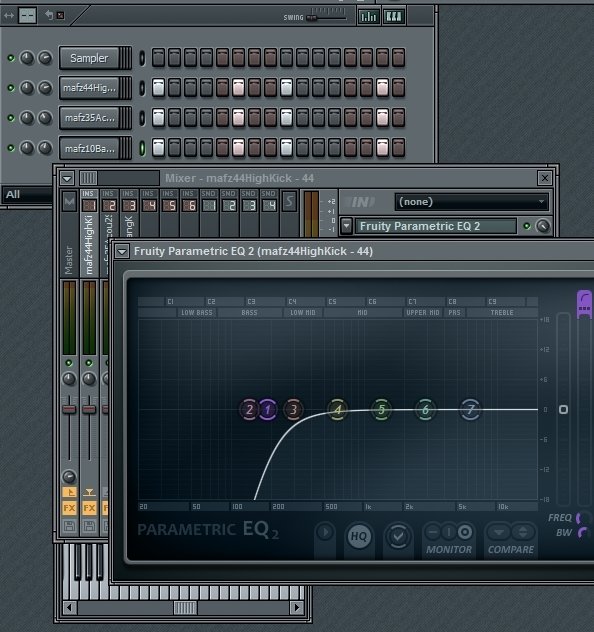
Listening closely to the sound, I can tell that I might want to EQ some things, for example I may want to take out some of the low-end on our first kick sound so that I can turn up the new kick a little bit. In fact I’ll do this. I’ll link the channels to the mixer, and do just that to see how it sounds.
Step 5 – Bring in Some Claps
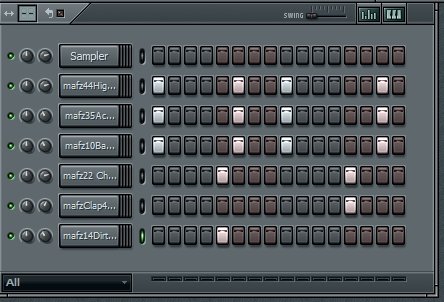
I could continue to work on the kick, but I would need a few more tracks in the mix to see what needs to change. It’s time to start working on the snare element. I’ll bring in Clap 22 from the Mafz pack and simply place it on beat 2 and 4 to start with.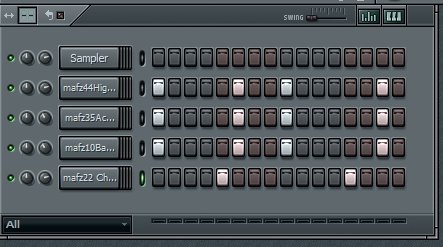
Step 6 – Adding Interest
This sounds pretty good to me, but I want to make it more interesting. Almost anything works when layering claps, perhaps because most clap sounds are essentially a group of individual claps recorded/layered together. So in many cases, to add another clap sound would increase the number of people clapping together.For this step, I just added Clap 2, to beat 4. I chose this clap because it’s longer and sounds more realistic to me. No amp envelopes or filtering were necessary, but I did turn the volume knob of the new clap down to about 60 percent.
Comparison and contrast are important in audio, and at this point I found that the clap on beat 4 sounds too big compared to the clap on beat 2. I want the claps to sound different, but not this much different.
So, I looked for another clap to layer, and found another realistic-sounding clap—Clap 14 from the Mafz pack. I added it only to beat 2, and lowered the volume to about 40 percent.
Now the claps on beat 2 and 4 sound really different, there’s a nice low clap / high clap contrast going on. But something I liked about this loop before I added the last clap was the abruptness of the first clap when compared to the second clap of the loop. Having a kick immediately follow the first clap was a good way to have an abrupt feeling, and I want to highlight this abruptness by making the first clap last a short amount of time.
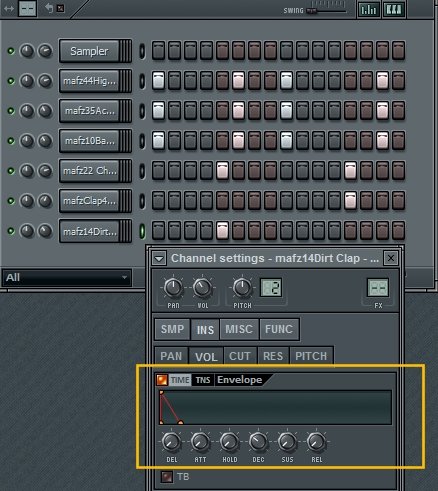
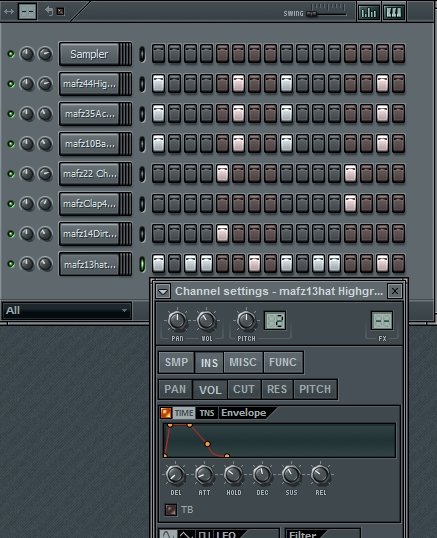
To restore this feeling, I’ll use the envelope in the channel settings of the clap I just added. An instant attack, and a medium-sized decay should be the only things in play in this envelope so I turned down every knob except the decay. You can hear me adjusting the decay knob in this next audio file and see the picture of the end result.
Step 7 – Turning Hi Hats into Shakers
From here it’s time to add some hats. I don’t usually layer hats but we will do some basic sound design on one. Let’s use Hat 13 from the Mafz pack.With the hat pattern I wanted to have a shuffle feel. Note that the “shuffles” appear in places where there is space between the kicks and snares. When you add more of anything to a project, it’s good to look for open spaces rather than pile everything together (unless you’re layering those sounds). I only reduced the volume of the hat to 40 percent.
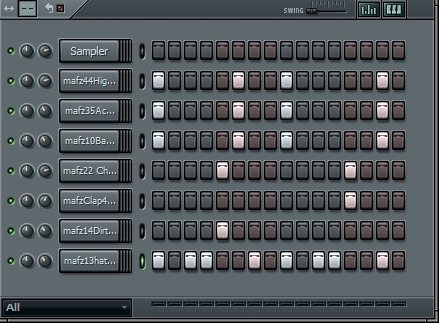
Those with keen ears might think that perhaps this hat sound was created in part by layering a shaker with a hi-hat. I don’t know if that’s the case or not, but being able to imagine things like this will come in handy when you try to take pieces from different audio files and put them together to make new ones. For this beat, we’re going to turn this hat into a shaker by adjusting the ATTack knob of its volume envelope as shown.
Step 8 – The Rest of the Song
Now we’re really getting somewhere with this beat. From here, you might decide to try to play in the beat from your keyboard for 8 bars or so. Having varying velocities and slightly imperfect timing will add a lot of humanness to this groove. Another option is that you could simply make another pattern that is very similar to this, and have an “A, A, A, B” arrangement. From here, it would be time to add instruments and you’ll be well on your way to a complete track.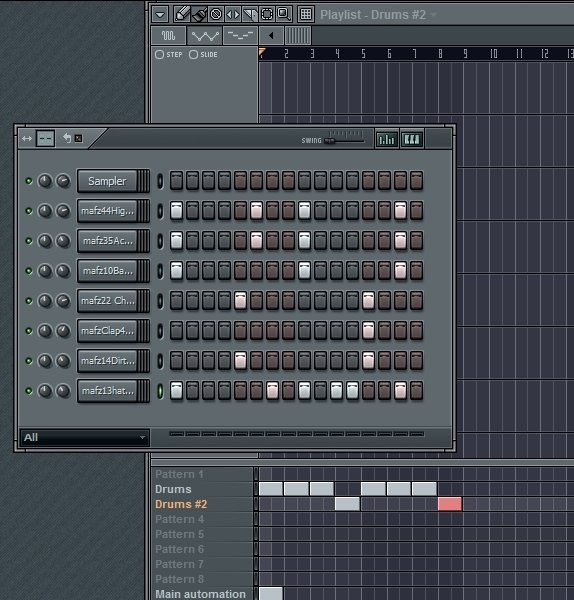
You can greatly expand your sonic possibilities through layering. Drums, cymbals, instruments—anything—can be layered, and sometimes the result sounds nothing like the parts that make up the layered sound. You might discover some new sounds and production techiques. So get out there, make some tracks, and become the master of your drums!
No comments:
Post a Comment